Even though the center of a truffle is traditionally ganache, truffles can be made with a variety of fillings ranging from nuts to caramel to nougat. When not made with ganache, these truffles are generally coated in a thin shell of hard chocolate. The truffles in this recipe will be made with a ganache center.
Ganache is simply a mixture of chocolate and cream. For the centers of these truffles, we'll make hard ganache - utilizing significantly more chocolate than cream. A ratio of about 2 to 1 of chocolate to cream by mass will yield a dense ganache appropriate for making truffles.
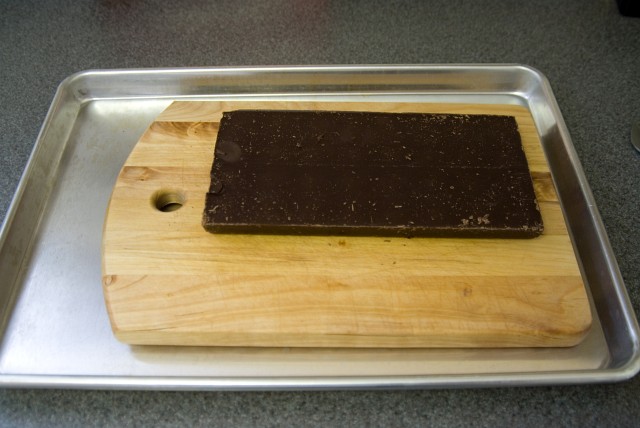 Obtain 1 pound (455 g) of dark chocolate and 1 cup (235 mL) heavy whipping cream. Be sure to select a chocolate that you enjoy the flavor of.
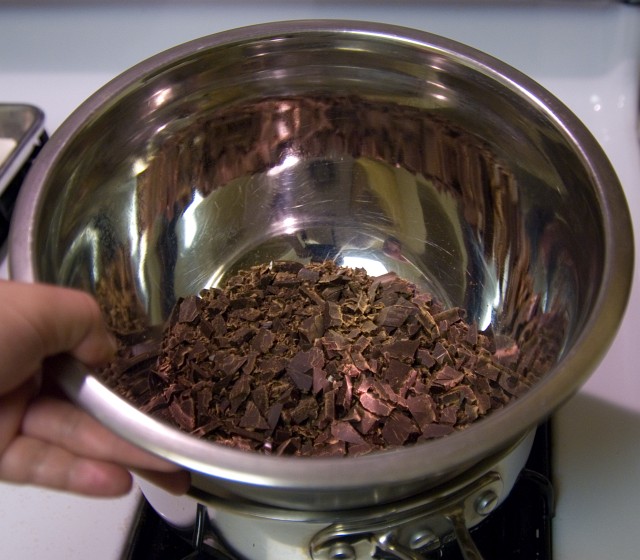
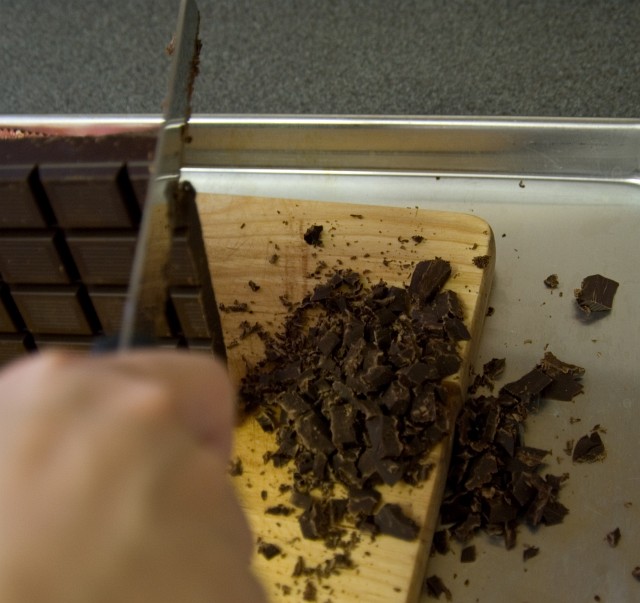 Cut the chocolate into pieces using a large serrated knife (like a sturdy bread knife). Cutting the chocolate into strips about 5 mm apart with the serrated knife will cause the chocolate to break into small pieces. Pieces of chocolate will fall all over the place, so I like to place the cutting board in a sheet pan to catch the chocolate shards.
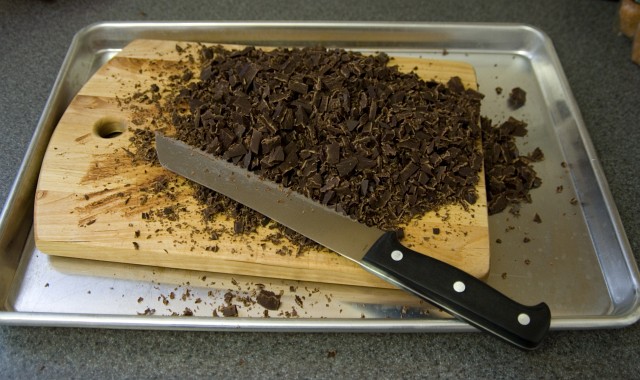 After breaking down the whole pound of chocolate, you should have a bunch of similarly sized pieces. Small, uniformly sized pieces will make melting the chocolate evenly easier. Pour all the pieces into a medium heat proof bowl.
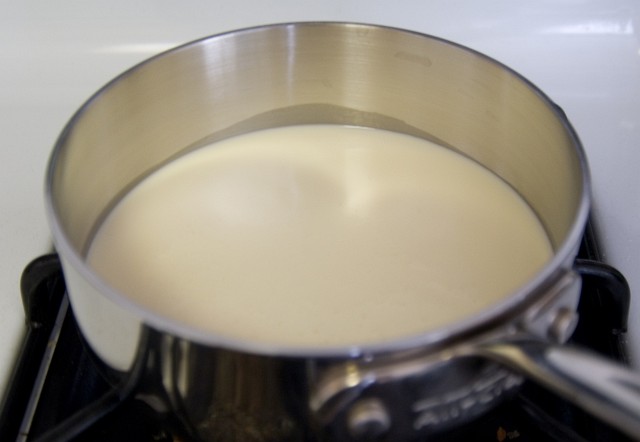 Bring the cup of heavy whipping cream just to a boil. (This is called scalding.)
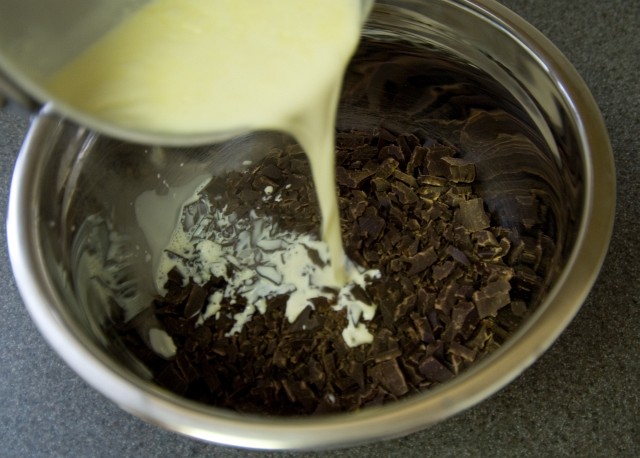 Pour the scalded heavy cream onto the chocolate and allow it to sit for five minutes.
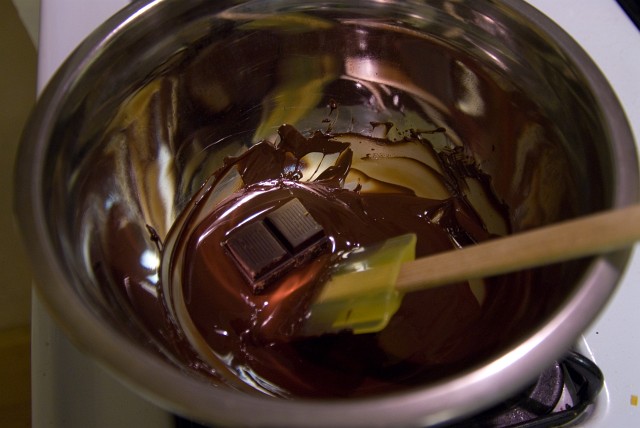
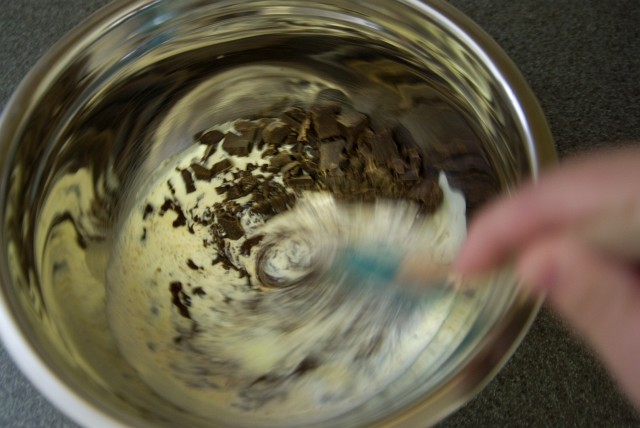 Stir the now melted chocolate with the cream. Chocolate and small amounts of aqueous solutions (liquids containing water) do not mix well - the chocolate clumps up in what is called seizing. However, when a substantial amount of liquid is added to the chocolate, we can make chocolate syrup. A ganache is simply a syrup of chocolate and cream that does not contain enough cream to be liquid at room temperature. Once this mixture cools, it will form a hard ganache that can be molded into shapes.
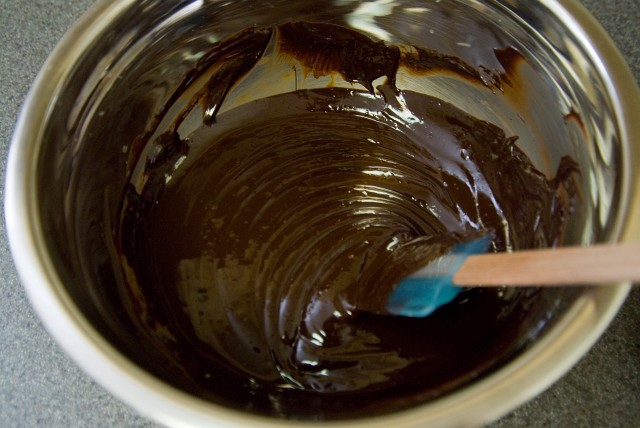 The melted ganache should be smooth in texture without lumps. If not all the chocolate has melted, you can heat the ganache gently over a hot pot of water. Stir until the chocolate melts and the ganache is smooth.
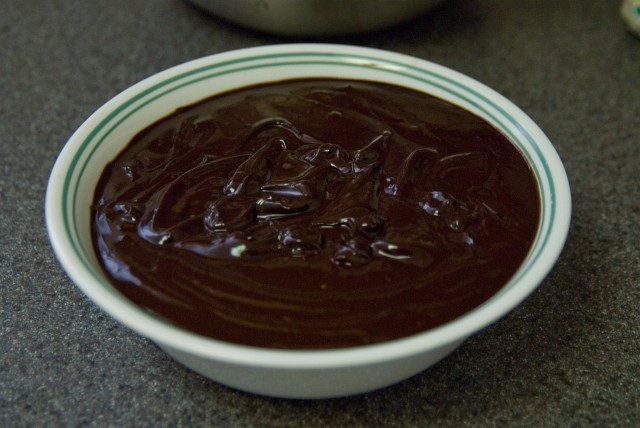 You can transfer the ganache into a smaller bowl to cool. When the ganache is solid, it may be easier for you to scoop out when working with a smaller bowl. Let the ganache cool down and chill for about an hour in the refrigerator to harden. Cold ganache is harder to scoop, but easier to form into a ball.
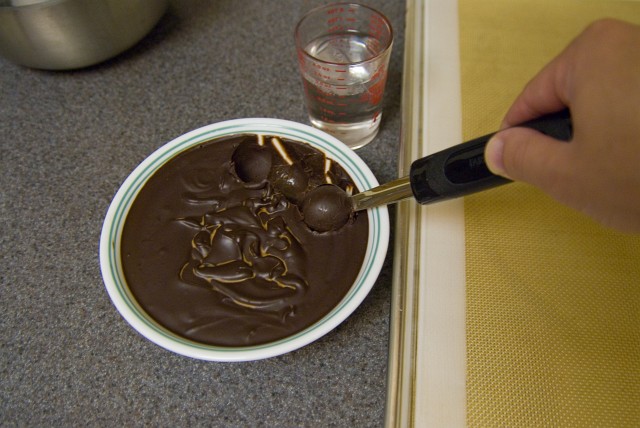 Using a melon baller or small ice cream scoop (such as a #70), scoop out balls of hard ganache and place on a cookie sheet lined with either parchment paper or a silicone baking mat. As the ganache gets warmer, it will have a tendency to stick to the scooping device. You might find it easier to work with after rechilling the ganache, dipping the utensil in ice water, or simply using your hands to form rough spheres.
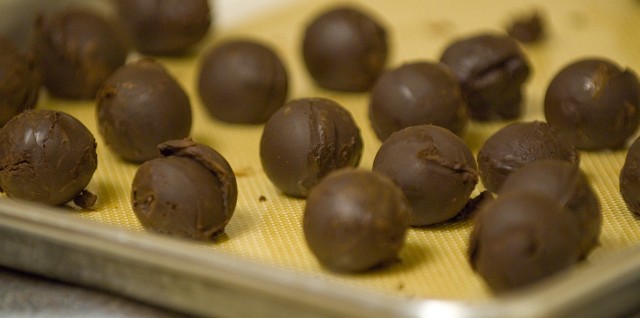 After forming all the balls, chill the pan in the refrigerator for fifteen minutes to allow the ganache to harden back up and set into their shapes.
 Scoop a little cocoa powder into a small bowl. Use a pair of spoons to pick up and roll each ganache ball in the cocoa powder to coat.
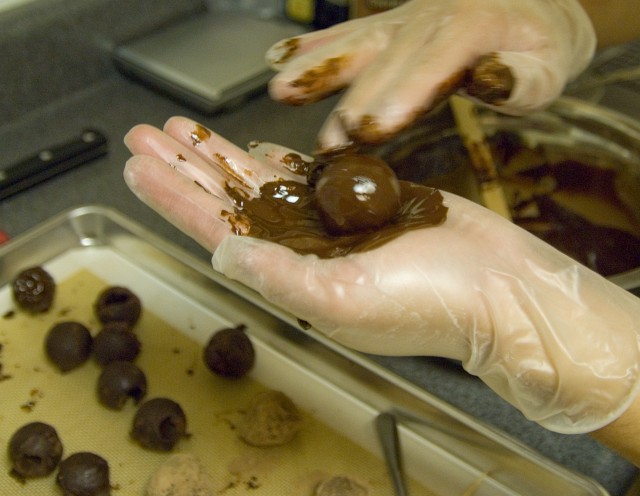 If you prefer a hard chocolate shell, then you'll need to melt and temper some chocolate(usually, a couple ounces will be more than enough to coat the truffles). Once the chocolate has been tempered, use a spatula to spread some onto the palm of one hand. Place the ball of ganache into the layer of chocolate and rotate, coating the ball. Place the truffle on a sheet of parchment paper or silicone baking mat or other nonstick surface for it to cool and set. Repeat the spreading of chocolate on the palm and coating for each truffle. The tempered chocolate will shrink slightly as it cools and clad itself to the ganache. Because of this shrinking action, if it cools too rapidly, the shell can crack, so don't immediately chill them in the refrigerator - allow the truffles to set in a cool room. The ganache should also be allowed to warm up a bit before you coat them. After the chocolate has hardened, chill for 15 minutes in the refrigerator and then remove and store at room temperature. The chocolate coated truffles should not be allowed to touch each other (touching the truffles together can mar the hard surface of the truffles) - so divide them with small paper cups or paper muffin liners.
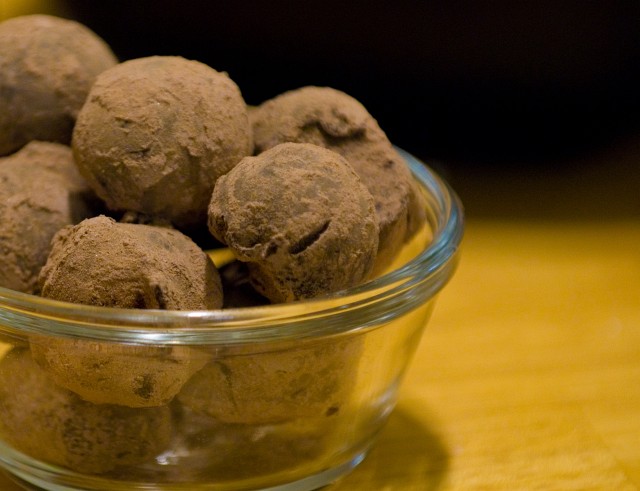 The cocoa dusted truffles can be packed together without harm. These truffles can be stored at cool room temperature in an airtight container for at least a month - but good luck keeping them from being eaten for that long!
Chocolate Truffles (yields about 32 to 36 truffles)
| 1 lb. (455 g) dark chocolate | cut into small pieces | pour onto chocolate | wait 5 min. | stir until smooth | chill | form into balls | dust |
| 1 cup (235 mL) heavy whipping cream | scald | ||||||
| cocoa powder |
Tempering Chocolate
When melted chocolate returns to solid form the cocoa butter in the chocolate forms a crystal structure. The strange (or cool depending on who you're talking to) thing about cocoa butter is that the crystal structure they take on depends on the temperature at which they are formed. If the chocolate is allowed to cool on its own, the crystals of fat will be loose, resulting in a chocolate that is dull in appearance, soft & malleable, and greasy to the touch. This loose crystalline structure has a slightly lower melting point than tempered chocolate crystals. If, instead, while cooling, the chocolate is kept at 88°F (31°C), the loose crystal structure will not form (88°F is above the formation point of the loose crystals). At this temperature the cocoa butter actually forms a dense crystalline structure. Holding the chocolate at this temperature and stirring will allow a whole bunch of these stable crystal structures to form providing a lot of seed crystals to form in the chocolate. When the chocolate is finally allowed to fully cool, if there are enough stable seed crystals, then the chocolate will harden into a very stable hard chocolate with a slight sheen, snap when broken, and will keep for months at cool room temperature. Tempered chocolate provides enough stability to be worked into a variety of shapes - sheets, painted onto leaves and peeled off, flowers, cups, and molds. It also helps prevent the cocoa butter from rising to the surface of the chocolate and blooming into unsightly light brown markings or coatings.
To temper, most chocolate books will tell you to fully melt the chocolate and then to pour 3/4 of the chocolate onto a marble slab and repeatedly fold the chocolate onto itself and smear it across the marble until the chocolate is a uniform 82°F (28°C). The chocolate is then returned to the remaining hot chocolate and stirred in. The final mixture is either reheated or the residual heat is enough to bring the temperature back up to 88-90°F (31-32°C). This technique is can be a bit tricky and requires a marble slab (or other large, flat, cool surface like a sheet of aluminum or upside down sheet pan), a plastic scraper for smearing the chocolate (a spatula will also work), and a chocolate thermometer (an instant read that can measure accurately to the degree like the Thermapen will also work fine). The chocolate needs to be worked sufficiently on the marble slab for enough seed crystals to form, so you have to work relatively quickly as the chocolate cools. A good way to tell when you've reached the right temperature and stage is to pay attention to the viscosity of the chocolate. When the chocolate begins to thicken a little, you've reached the point where seed crystals are forming and you should be able to reincorporate it into the rest of the chocolate. The tempered chocolate must then be kept at tempering temperature, 88-90°F (31-32°C) until used.
I find that the seed method (as described in The Professional Chef) is a little easier. Since almost all the chocolate that is sold is already tempered, we can use a piece of this already tempered chocolate as a plentiful source of seed crystals.
Melt the chocolate in a double boiler while stirring to ensure unform temperature.
 Once the chocolate has fully melted and reached a temperature of over 105°F (41°C), remove it from the heat. At this temperature, all the crystals, loose or stable, should be melted. Add a piece of unmelted chocolate to provide the seed crystals. This piece can be as big as 2 ounces (if you're melting a sizeable amount of chocolate) or can be chopped up into a few smaller pieces.
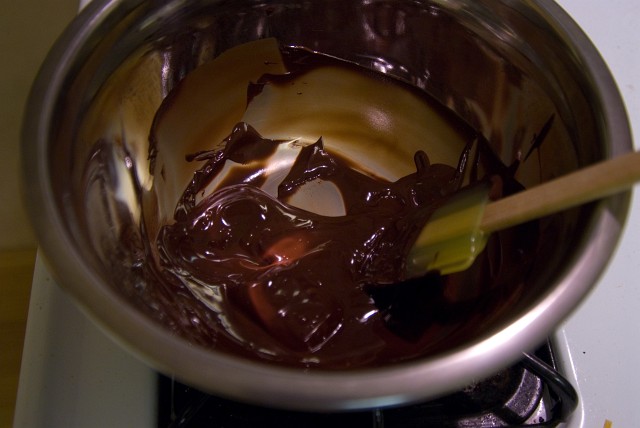 Stir until the chocolate's temperature enters the tempering range, 88-90°F (31-32°C). The chocolate should be kept at this temperature until used.
Specific Tempering Temperatures
Depending on the cocoa butter content of the chocolate and introduction of other ingredients, the tempering temperature of chocolate varies. Harold McGee's On Food and Cooking provides these values for the three broad categories of chocolate:
| Type of Chocolate | Tempering Temperature |
|---|---|
| Dark (no milk content) | 88-90°F (31-32°C) |
| Milk | 86-88°F (30-31°C) |
| White | 80-82°F (27-28°C) |
Note that although white chocolate does not contain any cacao solids, it is still subject to the same tempering procedures since it is made of cocoa butter.
Storage
Tempered chocolate can be stored for several months without blooming at constant cool room temperature, 60-65°F (15-18°C).