Words from Owner..

Salam and Hello to all readers who have drop by here..thanks coz spend your time to view my blog..This blog provide you many type of recipes from many cuisine in this world..all recipes are not mine..i get this all recipes from many web site and blog and mostly from Kuali.com and Rasa Malaysia.. thanks to all web site & blog authors who give me permissions to share their recipes and put it on my page..tqvm!


regards,
hudafaizal


Monday, December 6, 2010

Spicy Okra

Spicy Okra
By Chef Priya Menon


Ingredients

    • 250g ladies finger or okra, washed and dried
    • 1 big onion, sliced finely or diced
    • 5 pieces dried chilli, break into small pieces
    • 1 tbsp ginger, diced
    • 1 tbsp garlic, diced
    • 1 tbsp green chilli, diced (optional)
    • 1 tsp whole mustard seeds
    • 1 tsp whole fennel
    • 1 tsp whole cumin
    • 1/2 tsp turmeric powder
    • 1 small sprig curry leaf
    • oil and salt as required

Method

    Wash and dry okra. Its important that the okra is dry to avoid its slime. So dry it before you slice the okra as desired.
    Heat oil in pan over very low heat and add mustard seeds, cumin and fennel.
    When mustard seeds start to splutter, add the diced onions, garlic, ginger, curry leaves, green and dried chillis.
    Stir fry the whole masala for about a minute and then add turmeric and okra.
    At this stage , bring the heat up to medium and add salt to the okra.
    Gently stir fry till the okra is coated with the spices.
    When the vegetable is soft to the touch, its done. Remove from heat and serve.
    Note : this is the best way to familiarise your self with the taste of whole spices. This is a very familiar classic Indian dish. This is Still one of my favourite all time vegetacle dish. If you add yogurt to this dish , it becomes a fried okra raita. the possibilities with this basic dish is immense.

Tuesday, November 2, 2010

Soy Pepper Chicken

Soy Pepper Chicken
By Chef Priya Menongal

Ingredients

    • 750g chicken, cut into bite size piece
    • 3 onions, sliced
    • 6 cloves garlic, sliced
    • 3 tbsp ginger, diced
    • 3 tomatoes
    • 1 tsp cumin, coarsely pounded/ground
    • 1 tsp fennel, coarsely pounded/ground
    • 1 tsp coriander seeds, coarsely pounded/ground
    • 1 tabsp black pepper, coarsley pounded/ground
    • 2 sticks cinnamon, coarsley pounded/ground
    • 4 star anise, coarsley pounded/ground
    • 4 cardamom, coarsley pounded/ground
    • 5 dried chillies, broken
    • 3 fresh chillies (optional)
    • 2 sprigs curry leaves
    • coriander leaves for garnishing
    • 6-7 tbsp thick soy sauce
    • salt or light soy sauce as required
    • oil about 1/2 cup

Method

    Marinate chicken in soy sauce, pepper, cumin, fennel, coriander and one sprig of curry leaf for about 30 minutes, longer if time permits.
    Heat oil in pan and fry cinnamon, star anise, cardamom, cloves, dried chillies and curry leaves over low heat. Add onions,garlic and ginger and fry till onions turn slightly golden.
    Add the marinated chicken and cook, stirring occasionally. When chicken is almost cooked, add tomatoes and fresh chillies and cook till done.
    Remove from heat and garnish with coriander leaves.
    Note: Always cook on low to medium heat, to prevent chicken from sticking to pot.

Friday, October 8, 2010

Chilli Fried Fish

Chilli Fried Fish
By Chef Priya Menon


Ingredients

    • 250 - 500g of your favourite fish, use whole or sliced
    • 1 level tsp turmeric powder
    • 1 tbsp chilli powder
    • 1/2 tsp black or white pepper, powder or crushed (more if you like it spicy)
    • 1/2 tsp garlic paste
    • 1/2 tsp ginger paste
    • 1 tbsp yogurt (optional)
    • salt to taste
    • oil for frying

Method

    Mix a marinade with the spices, garlic and ginger paste, yogurt, salt and coat the fish. Leave it to marinate for at least 1/2 an hour or more if possible.
    The fish can be grilled or fried.
    Note: I have used this marinade for Talapia, Siakap and other fresh water fish as well.

Thursday, September 9, 2010

quick salmon tikka with cucumber yoghurt

quick salmon tikka with cucumber yoghurt  (17 minutes)

method


I love this dish. If you’re a fan of chicken tikka masala, give this one a go. You might think it odd to use robust spice pastes on fish, but it’s very common in southern India. When buying your fish, ask the fishmonger to scale it for you. You'll be amazed at how quickly these cook.

• Preheat your oven to 110°C/225°F/gas ¼
• Pop your naan breads into the oven to warm through
• Halve, deseed and finely chop your chilli
• Peel and halve your cucumber lengthways, then use a spoon to scoop out and discard the seeds
• Roughly chop the cucumber and put most of it into a bowl
• Halve your lemon and squeeze the juice from one half into the bowl
• Add the yoghurt, a pinch of salt and pepper and half the chopped chilli
• Pick the coriander leaves and put to one side

• Slice each salmon fillet across lengthways into three 1.5cm wide slices
• Spoon the heaped tablespoon of tandoori paste into a small dish, then use a pastry brush or the back of a spoon to smear the tandoori paste all over each piece (don’t dip your pastry brush into the jar!)
• Heat a large frying pan over a high heat
• Once hot, add a lug of olive oil, put the salmon into the pan and cook for about 1½ minutes on each side, until cooked through

• Place a warmed naan bread on each plate
• Top each one with a good dollop of cucumber yoghurt and 3 pieces of salmon
• Scatter over a little of the reserved cucumber, chilli and coriander leaves and finish with a squeeze of lemon juice


• from Jamie's Ministry of Food


Visit the Jamie Oliver Patak's page

ingredients


• 2 naan breads
• 1 fresh red chilli
• ½ a cucumber
• 1 lemon
• 4 tablespoons natural yoghurt
• sea salt and freshly ground black pepper
• a few sprigs of fresh coriander
• 2 x 200g salmon fillets, skin on,scaled and bones removed
• 1 heaped tablespoon Patak’s tandoori curry paste
• olive oil

Wednesday, August 11, 2010

macaroni cheese

method


This is my twist on the old-school frumpy Anglicized dish of macaroni cheese. Using these four different cheeses together, each one with its own characteristics, works really well. For the classic finish, it has to be popped under the grill to crisp up and go brown on top – lovely. Once you see how quick it is, you won’t be making any bechamels or claggy old sauces for a long time.

Preheat your oven to 200ºC/400ºF/gas 6. Cook the macaroni in a pan of salted boiling water 2 minutes short of the timing on the packet instructions, then drain in a colander and reserve a little of the cooking water. Heat the butter in a large heavy-based frying pan. When it starts to foam, add the marjoram or oregano and fry for a minute until it starts to crisp up, then turn off the heat. Add your cooked pasta to the marjoram or oregano butter, along with a couple of spoonfuls of the reserved cooking water and the Parmesan, fontina or taleggio and mascarpone. Return to a medium heat and toss and stir around until most of the cheese has melted and you have a lovely gooey sauce – you may need to add a little more of the reserved cooking water. Season to taste, then tip it all into an earthenware dish. Grate over the nutmeg, tear over the mozzarella and sprinkle over the extra Parmesan. Bake the macaroni cheese in the preheated oven for about 10 minutes, finishing up with a quick whack under the grill, until golden brown and crispy on top.


• from Cook With Jamie
macaroni cheese

ingredients


• 500g/1lb 2oz good-quality macaroni
• sea salt and freshly ground black pepper
• a knob of butter
a small bunch of fresh marjoram or oregano, leaves picked
• 100g/3½oz Parmesan cheese, freshly grated, plus extra for grating
• 100g/3½oz fontina or taleggio cheese, roughly torn
• 100g/3½oz mascarpone cheese
• ¼ of a nutmeg
a small ball of buffalo mozzarella cheese

Thursday, July 8, 2010

lemon linguine

lemon linguine

method


When I was on honeymoon, some years ago now, I came across these fantastic Sicilian lemons. Their skin is really fragrant in cooking and they are very juicy too. You can use them roasted with fish, sliced very thinly in salads, and halved and put inside chicken. When roasted they go all jammy. This pasta recipe is great to use them in too, so try and find some – if you can’t find any, use normal lemons instead.

Cook the linguine in a generous amount of boiling, salted water for about 12 minutes, then drain thoroughly and return to the saucepan. Meanwhile, beat the lemon juice and zest with the olive oil, then stir in the Parmesan – it’ll go thick and creamy. Season and add more lemon juice if needed. Add the lemon sauce to the linguine and shake the pan to coat each strand of pasta with the sauce (the Parmesan will melt when mixed with the pasta). Finish by stirring in the chopped basil and the rocket.

ingredients


• 500g dried linguine pasta
• juice of 3 Sicilian lemons and zest of 1
• 6 tablespoons extra virgin olive oil
• 125g Parmesan cheese, grated
• sea salt and freshly ground black pepper
• a large bunch of fresh basil, leaves picked and finely chopped
• a handful of rocket

Monday, June 28, 2010

Dragon Well Tea Shrimp Recipe (龙井虾仁)

Dragon Well Shrimp

RECIPE: LONG JING XIA REN (龙井虾仁) / DRAGON WELL TEA SHRIMP
INGREDIENTS:
1/2 lb raw, peeled & frozen baby shrimp
1 tablespoon Shaoxing wine
1/8 teaspoon salt or to taste
2 teaspoons oil
1 heaped tablespoon Longjing tea leaves
1/4 cup hot water
Some chopped scallion
1 tablespoon egg white
1 teaspoon corn starch
METHOD:
Defrost the frozen shrimp, rinse well, and pat dry with paper towels. Add corn starch and egg white to the shrimp and marinate for 15 minutes. Prepare the tea in a small tea pot by adding 1/4 cup hot water to the tea leaves. Set aside for 5 minutes and then filter the tea and set aside for the stir-fry.
Heat up 1 teaspoon cooking oil in a wok and toss in the shrimp. Do a few quick stir until the shrimp is 50% cooked, dish out and set aside. Wash the wok and heat it up again with the remaining 1 teaspoon cooking oil. Add the shrimp back into the wok, and quickly follow by the tea, Shaoxing wine, salt, and chopped scallion. Do a quick stir over high heat until the shrimp is cooked, dish out and serve immediately.

Thursday, June 24, 2010

quick sausage meatballs with a tomato and basil sauce, spaghetti and sweet raw peas

method


This is a fantastic recipe that completely celebrates everything I love about peas. Even though they only make an appearance right at the end, it’s a star performance. I like to serve a pile of unpodded peas in the middle of the table so that everyone gets to pod some over their own plate. It’s also an incredibly fast recipe – you can be sitting down to eat within a minute of the pasta being done. The key to getting it right, though, is to buy really good-quality sausage.

Heat a large saucepan and add a few glugs of olive oil. Snip the sausages apart, then squeeze and pinch the meat out of the skins so that you get little meatball shapes – don’t make them too big or they will take too long to cook. Try to get at least three balls out of each sausage. Don’t worry about rolling them into perfect balls and making them look all fancy – rough and rustic is good! Put them into your pan. Keep frying and turning the meatballs until they’re golden brown and cooked through.

Meanwhile, put the spaghetti into a large pan of salted boiling water and cook according to the packet instructions until al dente.

To make your tomato sauce, heat a separate pan and pour in some olive oil. Add the garlic and the chopped basil stalks and move them around the pan for a couple of minutes. Put some small basil leaves to one side for later, and sprinkle the rest into the pan. Add the tomatoes and season carefully to taste. Bring to a simmer, break up your tomatoes a bit more with a spoon and add a swig of balsamic vinegar – it’s lovely for adding sweetness to the sauce.

Add the herbs to the pan of sausage meatballs, tossing everything in all the lovely flavours. Cook for around 30 seconds. When your spaghetti is cooked, drain it and divide the pasta and meatballs between four bowls. Spoon over the tomato sauce. Sprinkle over the reserved basil leaves and serve with a handful of fresh peas per person in the middle of the table, so that everyone can have a go at podding their own, and a little Parmesan for grating and shaving over the top.


• from Jamie at Home

quick sausage meatballs with a tomato and basil sauce, spaghetti and sweet raw peasingredients


• olive oil
• 8 good-quality pork sausages
• 500g spaghetti
sea salt
• 300g fresh peas, in their pods
• a block of Parmesan cheese, to serve
• a few sprigs of fresh marjoram, thyme or rosemary, leave picked

for the tomato sauce
olive oil
• 2 cloves of garlic, peeled and finely sliced
• a small bunch of fresh basil, leaves picked, stalks finely chopped
• 2 x 400g tins of good-quality plum tomatoes
• sea salt and freshly ground black pepper
• good-quality balsamic vinegar.

Thursday, June 17, 2010

meatballs and pasta

meatballs and pasta (uk version - metric)


method


Meatballs are fantastic! They’re perfect like this, with a one-minute homemade tomato sauce and spaghetti, but you could also try polenta or simple chunks of fresh crust bread. I like to make meatballs with a mixture of beef and pork, as I think it gives a really wonderful flavour and texture.

To make your meatballs
• Pick the rosemary leaves off the woody stalks and finely chop them
• Wrap the crackers in a tea towel and smash up until fine, breaking up any big bits with your hands
• Add to a mixing bowl with the mustard, minced meat, chopped rosemary and oregano
• Crack in the egg and add a good pinch of salt and pepper
• With clean hands scrunch and mix up well
• Divide into 4 large balls
• With wet hands, divide each ball into 6 and roll into little meatballs – you should end up with 24
• Drizzle them with olive oil and jiggle them about so they all get coated
• Put them on a plate, cover and place in the fridge until needed

To cook your pasta, meatballs and sauce
• Pick the basil leaves, keeping any smaller ones to one side for later
• Peel and finely chop the onion and the garlic
• Finely slice the chilli
• Put a large pan of salted water on to boil
• Next, heat a large frying pan on a medium heat and add 2 lugs of olive oil
• Add your onion to the frying pan and stir for around 7 minutes or until softened and lightly golden
• Then add your garlic and chilli, and as soon as they start to get some colour add the large basil leaves
• Add the tomatoes and the balsamic vinegar
• Bring to the boil and season to taste
• Meanwhile, heat another large frying pan and add a lug of olive oil and your meatballs
• Stir them around and cook for 8–10 minutes until golden (check they’re cooked by opening one up – there should be no sign of pink)
• Add the meatballs to the sauce and simmer until the pasta is ready, then remove from the heat
• Add the pasta to the boiling water and cook according to the packet instructions

To serve your meatballs
• Saving some of the cooking water, drain the pasta in a colander
• Return the pasta to the pan
• Spoon half the tomato sauce into the pasta, adding a little splash of your reserved water to loosen
• Serve on a large platter, or in separate bowls, with the rest of the sauce and meatballs on top
• Sprinkle over the small basil leaves and some grated Parmesan


• from Jamie's Ministry of Food

ingredients


• 4 sprigs of fresh rosemary
• 12 Jacob’s cream crackers
• 2 heaped teaspoons Dijon mustard
• 500g good-quality minced beef, pork, or a mixture of the two
• 1 heaped tablespoon dried oregano
• 1 large egg, preferably free-range or organic
• sea salt and freshly ground black pepper
• olive oil
• a bunch of fresh basil
• 1 medium onion
• 2 cloves of garlic
• ½ a fresh or dried red chilli
• 2 x 400g tins of chopped tomatoes
• 2 tablespoons balsamic vinegar
• 400g dried spaghetti or penne
• Parmesan cheese, for grating

Monday, June 14, 2010

chocolate fridge cake with pecan and meringues

chocolate fridge cake with pecan and meringues

method
This chocolate cake is wicked! And even better, you don't need to do any baking.

Break the biscuits into small pieces directly into a large bowl. Add the pecans, pistachio nuts and cherries and mix together. Put the rest of the ingredients into a separate, heatproof bowl and put on a low heat over a pan of simmering water until the butter and chocolate have melted.

Combine the biscuit mix with the chocolate mixture. Line a 30 x 20 cm plastic container with clingfilm, leaving plenty of extra film at the edges to help turn the cake out later. Whack everything into the container, place in the fridge to firm up then turn out and cut into chunky slices.

This cake can be kept in an airtight container for a few days, and it actually improves in flavour!

ingredients


• 200g digestive biscuits
• 110g whole pecans, roughly chopped
• 110g pistachio nuts, peeled
• 10 glace cherries
• 2 ready-made meringue nests, smashed up
• 150g unsalted butter
• 1 tablespoon golden syrup
• 200g dark chocolate

Sunday, June 6, 2010

Lamb Basic Cuts


Lamb Cut
Characteristics
Cooking Methods
The leg of lamb comes from the hind quarter of the lamb. The leg may be a whole leg with sirloin attached, partly boned or a center cut roast. The classic leg of lamb is the most versatile cut as it can be rolled and tied, butterflied, boned, cubed (for kebabs) or prepared whole. The leg, with little surrounding fat and minimal fat inside, can easily be trimmed to you specification. The meat is tender yet firm and is suitable for a variety of cookery. It is economical cut for entertaining and great for leftover. Lamb legs will serve at least six, sometimes more.
  • Roasting
  • Broiling (cubed meat)
  • Barbecuing
The loin of lamb comes from the middle, lower section of the rear quarter. The loin is usually divided into loin chops and lamb tenderloin. A lamb loin can be boned, rolled and tied or cut into loin chops. This jewel of the lamb is very tender, and cooking time should be minimal.
  • Roasting
  • Broiling
  • Pan Frying
The rack of lamb comes from the front/middle section of the lamb. Rib chops are individual or double chops from the rack. The rack is from the beginning of the lamb saddle through the full eye muscle (one of the premium parts of the lamb suitable for quick cooking to maximize the tender, juicy qualities of this cut). A rack can be frenched (removal of the fat tissue between the bones), capoff (removal of the fat cap) or fully denuded (all fat removed).
  • Broiling
  • Pan Frying
  • Roasting
  • Grilling
The shoulder of the lamb, derived from the front quarter, is the most economical cut. It is most suitable for long, slow, moist cooking to tenderize it. Quite often the shoulder is cut into shoulder chops. Lamb stew or ground meat is suitable for casserole or lamb patties, and often comes from the shoulder.
  • Braising
  • Stewing
  • Pan Frying
Lamb shanks come from the latter part of the leg and are best roasted or braised to elicit the juices from the bone. Shanks are almost always cooked in liquid, at length, until the meat starts separating from the bone. Although long slow cooking is a must, the twin rewards of flavor and unique taste are more than justified.
  • Stewing
  • Braising

Friday, June 4, 2010

Beef Cuts


This list is by no means definitive, there are probably even more names out there for the same cuts, but it's a start and will keep you from making the more common mistakes.

Many steak recipes call for marinades and not all steaks can be grilled. In fact, there are very few that can be cooked really successfully in this way. But each cut has its place in a balanced group of beef recipes, so let's take a look at them.

Blade
Sometimes called 'bolar', this steak comes from the neck, shoulder and brisket and is usually braised, but can be pan-fried or grilled after marinating. It would not be most people's first choice.

Chuck
Definitely one for braising, or for making into a casserole, which is when it comes into its own. You will need to trim it carefully. It comes from the shoulder area.

Club Steak
This is the same as wing rib and is for roasting. A superb cut of meat and you will pay accordingly, if you can get hold of some. Most of it goes to hotels and restaurants. It's a relatively small part of the carcass comprising the last two ribs.

Eye Fillet
Also known as the tenderloin, this is usually and justifiably the most expensive cut. There's not very much of it and it's found under the sirloin, or middle back. It's excellent for the barbecue and the broiler. It is also chopped finely and eaten raw, as in Steak Tartare.

Fillet
Sometimes called 'Undercut', this is excellent for the barbecue, grilling or pan frying. Some braising recipes also stipulate it. It's the tail end of the eye fillet.

Flank
This is the unkindest cut of all and comes from the underside of the carcass, just forward of the back legs. It's good for braising and casseroles, but requires extended cooking. It's excellent in slow cookers such as crock-pots.

New York Cut
That's what we Aussies call it, but in fact it's the famous English Porterhouse, the French entrec?te and arguably the tastiest of all the steaks. It requires a little patience to remove the filament of gristle just under the fat, but it's worth the effort. This steak is one of two that makes up the T-bone and is also called the Sirloin Steak.

Rib Steak
It's pretty unusual to come across this cut as a steak. It's usually served as a standing rib roast which is probably the best use for it. The steaks are huge and cut from the back-end of the 'hump'. You would barbecue, pan-fry or grill these, though they could be braised.

Rump
As you would expect, this steak is from the rump of the beast and is good for barbecue, broiler and skillet. It may also be braised.

Scotch fillet
Also call club steak and rib-eye. It comes from the same part of the beast as the rib steaks and can be braised or, after marinating, pan-fried or grilled. Also cooks well on the barbecue, but needs a good marinade.

T-bone
This is really two steaks in one. It has the Porterhouse on one side and the fillet on the other. It can be barbecued, grilled or pan-fried, and responds well to a light marinade.

Topside
In Australia this is called Round Steak and is often used for fish bait. It has another life, however, and is good for braising or making beef olives. It also casseroles reasonably well and makes a good goulash.

From time to time you may come across other minor cuts such as 'crosscut blade' or 'flat bone sirloin'. Generally speaking these are only good for casseroling or dishes where extended cooking is required.


Saturday, May 29, 2010

Pan Fried Fish Fillets

Last week I roasted a four pound cross rib roast (instead of a standing rib roast because I was too cheap to by prime rib just for an article). Well, I finally finished eating the roast. (After the initial feast, I sliced the roast into steaks and then reheated on a skillet for a couple minutes on each side with some onion powder and celery salt to produce a tender medium to medium-well steak dinner.) After eating steak (and grilled beef of several varieties because of the July 4th weekend), Tina decided she would like some fish.
We had some fairly thick fillets (about one inch) of catfish that I decided to pan fry (or saute, but I usually reserve this word for food that will actually be constantly moved on the pan). I always use a large non-stick skillet whenever I want to pan fry fish, but I had four fillets of catfish. I decided to do an experiment and cook all four at the same time - two on my non-stick skillet and two on my traditional saute pan.

My main concern was that the fish would stick to the stainless steel bottom of the traditional pan. After doing some research, it seemed that the Editors of Cook's Illustrated (in The Best Recipe) believed that heating a traditional pan enough prior to cooking would allow the fish to not stick to the stainless steel. I thought it was worth a try.

I heated both pans at medium-high heat. While the pans were heating, I seasoned the four fillets simply with salt and pepper. I poured about a tablespoon of oil in both pans and watched the oil until it shimmered. Then I placed two fillets in the non-stick pan and two fillets in the traditional pan. I started with the skin side up.

Since the fillets were about an inch in thickness, I set my timer for 5 minutes. I let the fish sit there and cook, splattering oil everywhere for the duration before attempting to dislodge them. The non-stick was pretty straightforward. I picked up the pan byt he handle and gave it a firm jerk. The fish fillets slide about an inch on the pan. Then I flipped them over with a spatula and started another timer for five minutes. I then moved over to the traditional pan and gave it the same jerk. No movement. I prodded a little with my spatula and it seemed like the fish was pretty much sealed to the pan. I dribbled a little more oil in and let it cook for an additional thirty seconds. Then I tried the jerk again. Nothing. Not wanting to over cook the fish, I went in with my spatula and carefully wedged teh edge of the spatula under the fish. Working my way around the fillet, I managed to release it and flip it over. I did the same with the second. What surprised me was that the color of the fish on the traditional pan was a rich golden brown while the non-stick pan gave me a darker brown crust. It was kind of a pain to scrape the fish off the traditional pan without destroying the fillet though. I started a second timer for the traditional pan - also at 5 minutes.

Once the five minutes were up for each of the pans, I removed them promptly onto a serving plate. In both cases, the fish were perfectly cooked - crispy exterior with almost flaking (but not quite flaky) interior. Also, the color from the traditional pan was a little better than the non-stick (although I couldn't discern a difference while tasting). However, the non-stick pan provides that extra insurance that a flip will be quick, easy, and efficient. In addition, the extra oil used in the traditional pan made for a bigger mess to clean up. When I usually use a non-stick pan, I will actually brush the oil onto the fish fillet and then pan fry without additional oil. This creates very little sizzle or splatter and makes for quick kitchen cleanup.
Pan Fried Fish Fillets 

1 Tbs. oilheatpan fry
Fish filletsseason
Salt
Pepper

Pan frying time
Fillet ThicknessCooking Time on each sideFat
Thick - 1 inch5 minutes1 Tbs. olive oil
Medium - 3/4 inch4 minutes1/2 Tbs. olive oil & 1/2 Tbs. butter
Thin - 1/2 inch3 minutes1 Tbs. butter
Copyright Michael Chu 2004

The olive oil should have a high smoke point - use either high quality extra virgin olive oil for more flavor or light olive oil.

Update: Some people have mentioned that you should never sear meat with extra virgin olive oil because of the low smoke point. This is generally true, but high quality extra virgin olive oil typically has a lower acidity than regular extra virgin olive oil. As one example, Bertolli brand extra virgin olive oil has a smoke point of 406°F. I would not use a supermarket brand extra virgin olive oil for any type of cooking because it would be too easy to exceed the oil's smoke point. 

Tuesday, May 18, 2010

Shrimp Scampi

Traditionally served over linguine, shrimp scampi makes a quick and easy dinner that works equally well eaten in front of the computer or as the main dish of a romantic candlelight dinner. I serve large shrimp (16-20 count) when I have company over, but for my own consumption, I use the less expensive 41-50 count variety. Cooking the shrimp in butter provides most of the flavor but garlic and parsley is essential to the dish. Linguine takes about the same amount of time to cook, which makes it the perfect compliment to shrimp scampi both culinarily and in terms of efficiency.

In the United States, shrimp is sold by "count". This is a rating of the size and weight of the shrimp. The count represents the number of shrimp in a pound for a given size category. For example, 41-50 count shrimp are composed of shrimp that weigh about 1/3 ounce each, while 16-20 count shrimp are an ounce each (or a little less) in weight. The lower the count, the larger the shrimp (and the more expensive).

Bring six quarts of water in a large pot to a boil. While waiting for the water to boil, peel one pound of shrimp, leaving tails on. Butterfly the shrimp by cutting the backs of each shrimp. While butterflying I also remove the vein (I think it's actually the alimentary canal) to avoid having gritty shrimp waste in my scampi. Rinse the shrimp and blot dry with paper towels. Once the water is boiling, stir in 1/2 tablespoon table salt and add one pound of dried linguine. (Cooking times for pasta varies by manufacturer. Use the instructions on the box, but be aware that many pasta manufacturers recommend cooking times that are to long for al dente. I suggest subtracting a few minutes from the cooking time and testing the pasta by biting down on it and looking at the cross section. There should still be a tiny speck of uncooked pasta when the noodles are al dente. Drain the pasta immediately; they will finish cooking as they stand.)

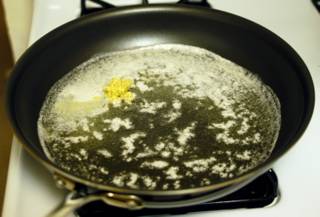
Melt four tablespoons of butter and two tablespoons of olive oil in the pan. Add about 2 teaspoons of minced garlic and 1/4 teaspoon salt (if using unsalted butter). Stir over medium-low heat until the garlic is lightly browned.


The shrimp should be added in a single layer on the pan (cook two batches if necessary). The shrimp can be cooked over low or medium heat. Over medium heat, the shrimp will form a slight crust and be golden brown when cooked. When the shrimp color changes and the flesh touching the pan is no longer translucent (about two minutes), flip the shrimps over with a pair of tongs or spatula.


Meanwhile, when the linguine is cooked to the desired level, pour the pasta into a collander to drain. Return the pasta to the pot or into a large bowl. When the second side of the shrimp is fully cooked (another two minutes), throw in one tablespoon chopped parsley and give it a quick stir. Remove from the heat and pour shrimp and butter over the pasta. Toss and serve with fresh grated parmesan, ground black pepper, and a slice of lemon.


Shrimp Scampi
1 lb. shrimpcook until opaqueflip; cook until opaqueadd
4 Tbs. buttermeltbrown
2 Tbs. olive oil
1/4 tsp. salt
2 tsp. minced garlic
1 Tbs. chopped parsley
Copyright Michael Chu 2004

Tuesday, May 11, 2010

Curry

Curry is a general categorization of a type of spicy dish popular all around the world. But when asked to explain what curry is to someone who has never had it, it's surprisingly difficult. Is it a paste, soupy mixture, spice, or powder? Let's see if we can clear it up a bit.

Curry leaves
In the past, the principal herb that seasons curry dishes is the leaf of a curry tree. (There is a different plant called the curry plant which should not be confused with the curry tree from which curry leaves are gathered.) The leaves can be used fresh (although, they don't keep very long), dried (which has a weaker aroma and flavor than fresh), and dried and ground up into a powder. Although the name "curry" comes from curry leaves, many (if not most) curries (the dishes) today do not actually contain curry leaves as a herb.

There are a variety of different curries depending on what region of the world you're in. In fact, there are more forms of curry than I can possibly imagine. I'll try to discuss a few of the types and let others provide their own comments on specific curry variations.

Indian curries
There are probably as many Indian curries as there are Indian villages. The exact mix of spices changes from household to household but almost always starts with the toasting of spices in a pan. Practically any dish that begins with toasted spices can be considered a curry. Traditionally, a common herb used is the curry leaf (which lends its name to the entire classification of prepared foods) but turmeric (providing the familiar yellow), coriander, ginger, garlic, chili, black pepper, and tamarind are just as common to be found in the mix. In fact, so many spices (sometimes more than twenty!) go into the prepared curry that it can be daunting to chef's new to Indian cuisine. Perhaps this is the reason why the British began to prepackage spice mixtures as "curry powder".

Indian curries are typically named after the main ingredient (excluding the spices). For example, potato curries and chicken curries are quite common. In addition, depending on the region, the curry can be a fairly dry dish (like a stir fry), a heavily sauced dish, or everything in between. Some regions utilize coconut while others emphasize ghee (a clarified butter) or dairy cream.

Thai curries
Thai curries usually don't have any curry (the leaves) in them. The cuisine has developed to use ingredients regional to Thailand and is typically identified by color.

Red curry - a name given to dishes made with red curry paste. Red curry paste is generally formed with red chilies, garlic, lemon grass, shallots, and galangal (Thai ginger) blended with other spices to form a paste.

Green curry - a name given to dishes made with green curry paste. Green curry paste is usually made in much the same way as red curry, but with green chilies instead. Green curries also tend to have the addition of cumin and coriander.

Yellow curry - a name given to dishes made with yellow curry paste. Yellow curry paste is similar to green curry paste, but with the addition of turmeric giving it the distinctive yellow color. Of all Thai curries, this is the type of curry most like Indian curry.

Thai curry dishes are usually prepared with meat (for example: beef, pork, duck, fish) and coconut milk.

Japanese curries
Curry is a popular dish in Japan. It is generally served as a thick, gravy-like sauce over rice (and, commonly, a fried pork cutlet is also provided). The sauce is often a dark brown color and often contains potatoes, carrots, and onions. Japanese curry is generally not considered a Japanese dish by the Japanese - instead it is usually classified as a Western food. (It is often more similar to British curries than traditional Indian curries.)

British curries
Although Britain's curries are derived from Indian curries, unless you are dining at a British restaurant specifically intending to provide authentic Indian cuisine, you'll discover dishes very different from their Indian counterparts. In fact, many of the dishes even have names that are the same or similar to Indian dishes - but often the similarity ends there. In general, the curry sauce is of a gravy consistency and have a variety of spices (including turmeric) blended with onion, garlic, and ginger. Most British curries do not contain curry leaves. One notable type of British curry is the Madras curry which uses a relatively large quantity of chili powder. Because of this, some places will use the term Madras to denote a spicier curry.

Curry Powder
So, if curries vary so much (and are essentially dishes prepared with a wide variety of spices), then what's in curry powder? Well that depends. In general, curry powder purchased in most Western stores which is simply labeled "curry powder" is British curry powder. The yellow color is from ground turmeric and often ground coriander seed is added as both a flavorant and a thickener. The rest of the curry powder is a mixture of finely ground spices which can include chilies, cloves, cumin, black pepper, ginger, cinnamon, mustard, fennel seeds, cardamom, and practically any other spice that suits ones fancy. Variations of this powder are used as a base for many forms of curry including not just British but also Japanese, Chinese, and other curries. Indian curry powder can contain over twenty spices and is often made daily and combined with ghee into a paste.

There are so many different curries out there that there's bound to be one you'll find enjoyable. From spicy to mild, coconut milk to ghee, every region has it's own distinctive taste and style. Let's go try a curry you've never had before.